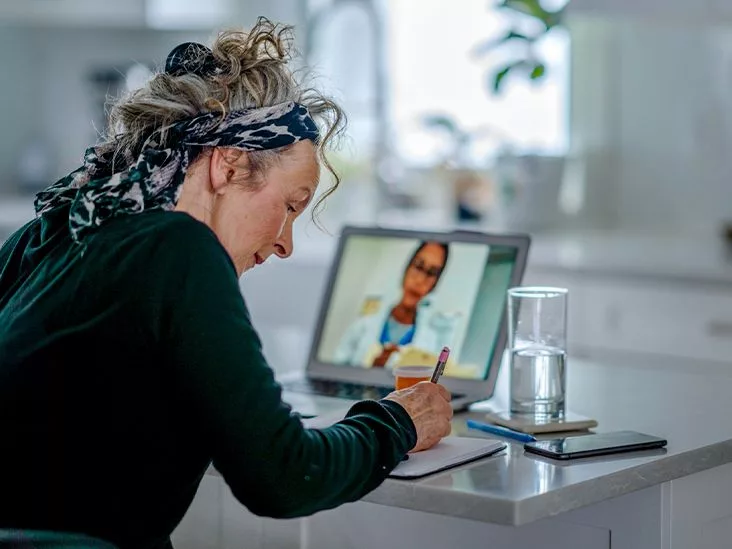
Ready to hop onto a video call with your doctor, but not sure where to start? You’re in the right place. In the next few minutes you’ll get a clear, step‑by‑step plan that takes the guesswork out of a virtual doctor visit. Grab a coffee, settle in, and let’s make sure you’re set up for success.
Why Prep Matters
Think of a telehealth appointment like a road trip. If you leave the house without checking the fuel gauge or the GPS, you’ll end up stuck on the side of the road. The same goes for a virtual visit—skipping the prep can lead to missed details, shaky connections, or even a rescheduled appointment.
Studies from the U.S. Department of Health & Human Services show that patients who follow a simple telehealth checklist are 30 % less likely to experience technical hiccups and 20 % more likely to leave the visit feeling satisfied (see the telehealth preparation guide). In short, a few minutes of preparation now saves you time, frustration, and maybe even a trip to the emergency room later.
Tech Checklist Essentials
First things first: your device. Whether you’re using a smartphone, tablet, or laptop, it needs to do three things—show your face, hear you clearly, and stay connected.
1. Choose the Right Device
Camera, microphone, speakers
Pick a device with a front‑facing camera and a working microphone. Test them by recording a short video and playing it back. If the audio sounds tinny or the video looks grainy, it’s time to adjust settings or borrow a better device.
2. Confirm Internet Speed
Speed‑test tools
A stable connection of at least 3 Mbps for both upload and download usually does the trick. Run a quick test on speedtest.net about 30 minutes before your appointment. If you’re below the threshold, try moving closer to the router or switching to a wired Ethernet cable.
3. Install & Update Software
Platform specific steps
Most clinics use Zoom, Doxy.me, or a custom patient portal. Download the app now, enable automatic updates, and sign in a day ahead. This avoids the dreaded “Can’t open the link” moment right before your call.
Space Setup Tips
Picture this: you’re on camera, the room behind you is a messy bedroom, and a cat walks across the frame. Not the vibe you want, right? A clean, well‑lit, private space makes a world of difference.
1. Light It Right
Natural vs. artificial lighting
Face a window or place a lamp in front of you. Avoid back‑lighting (like a bright window behind you) because it turns you into a silhouette. If you have a ring light, great—just keep it at eye level.
2. Reduce Noise
Headphones and quiet zones
Close doors, mute TVs, and ask roommates to keep chatter down. A simple pair of headphones not only blocks background noise but also improves the audio your doctor hears.
3. Guard Your Privacy
Secure, private environment
Pick a room where you can talk openly without being overheard. According to a recent HHS article on protecting telehealth privacy, a private setting also helps you stay compliant with HIPAA regulations.
Medical Prep Steps
Now that your tech and space are ready, it’s time to gather the health information your provider will need.
1. Assemble Your Health History
Medication list, allergies, recent labs
Write down every prescription, over‑the‑counter drug, and supplement you take. Include dosages and timing. If you have recent lab results or imaging reports, have them handy—most portals let you upload PDFs directly.
2. Create a Symptom Log
Printable tracker
| Date | Symptom | Severity (1‑10) | Triggers / Relief |
|---|---|---|---|
| 2025‑08‑04 | Headache | 7 | Worse with bright light; better with rest |
| 2025‑08‑05 | Cough | 4 | Worse at night; improves after water |
Having a quick glance at this table during the call helps you stay focused and ensures nothing slips through the cracks.
3. Capture Visuals When Needed
Photos of rashes, wounds, etc.
If you’re dealing with a skin issue, take a clear photo in good lighting and save it to your phone. Most video platforms let you share the image directly from the chat window.
Day‑of Workflow
All the prep can feel overwhelming, so a simple timeline keeps you calm.
1. Warm‑Up 10‑Minute Routine
Log in, test, breathe
About ten minutes before your scheduled time, click the appointment link, run a quick test call with a friend or use the provider’s “test your connection” feature. Adjust lighting, volume, and camera angle while you sip water and take a few deep breaths.
2. Join the Call Confidently
Greeting and verification
When the provider answers, introduce yourself, confirm your name and birthdate, and mention any immediate technical concerns. A brief “I’m in a quiet room with good lighting” reassures both of you that you’re ready.
3. Stay Engaged During the Visit
Steady camera, clear answers
Keep your device on a stable surface—think stack of books or a phone stand—so the camera stays at eye level. Listen carefully, repeat back any instructions you’re unsure about, and don’t hesitate to ask, “Could you show me how to do that again?”
Common Troubleshooting Issues
Even with perfect prep, things can go sideways. Here’s a quick rescue plan.
1. Connection Drops
Switch to hotspot or phone
If the video freezes, try moving closer to the router or switch to a mobile hotspot. Most platforms let you re‑join the same session with a new link.
2. Audio or Video Lag
Lower resolution, close apps
Turn off HD video in the settings and close any background applications that might be hogging bandwidth. This often restores smooth audio.
3. Platform‑Specific Glitches
Follow the provider’s FAQs
Zoom users can click “Audio Settings” > “Test Speaker & Microphone.” Doxy.me has a built‑in “Help” button that walks you through common issues. Most clinics will email you a short troubleshooting guide ahead of time.
After‑Visit Follow‑up
Leaving the call doesn’t mean the care ends. Capture the next steps while they’re fresh.
1. Write Down the Plan
Prescriptions, labs, timelines
Take a few minutes after the call to jot down any new medication doses, upcoming lab orders, and the date of your next appointment. If your provider sent you a summary via patient portal, download it now.
2. Upload Any Needed Documents
Insurance info, receipts
If you were asked to provide insurance details or a copy of a previous prescription, upload those files to the portal right away. It prevents delays in billing or medication refills.
3. Provide Feedback
Survey for better care
Most clinics send a short satisfaction survey after the visit. Your honest feedback helps them improve the telemedicine experience for everyone—including future patients just like you.
Expert Resources Box
Below are a few trusted sources and tools you can bookmark.
- Government guidance: The U.S. HHS “Preparing for a Video Visit” page offers official checklists and privacy tips.
- Peer‑reviewed research: The 2020 Frontiers in Medicine article “Preparing for Telemedicine Visits: Guidelines and Setup” outlines evidence‑based best practices.
- Technical tools: Speedtest.net for bandwidth checks, a free webcam testing site, and a simple note‑taking app like Evernote for your symptom log.
- Expert voice: “A well‑prepared virtual visit reduces clinical errors by up to 15 %,” says Dr. Glen McCracken, CMO of eVisit.
Wrap‑Up
Let’s recap the easy‑to‑remember formula: Test → Set Up → Gather → Join → Follow‑Up. By spending just a handful of minutes on each step, you turn a potentially stressful online medical appointment into a smooth, productive conversation with your provider. You’ll feel heard, you’ll stay safe, and you’ll get the care you need without leaving the comfort of your couch.
Now it’s your turn—download the printable Tele‑health Prep Checklist (you can copy the table above into a word processor) and give it a try before your next appointment. Have a tip that worked for you? Share it in the comments; we love hearing real‑world stories. If anything feels unclear, drop a question below—we’re here to help you feel confident and prepared for every virtual doctor visit.


Leave a Reply
You must be logged in to post a comment.