Want beach‑y waves without booking a salon appointment? You’re in the right spot. Below you’ll find the fastest ways to turn straight strands into bouncy, voluminous waves—whether you love heat tools or prefer a no‑heat DIY. Grab a cup of coffee, settle in, and let’s dive into the world of effortless wavy hair styling.
Know Your Hair
Before you start twisting, braiding, or heating, it helps to understand what your hair is really capable of. Straight, fine hair will react differently to a curling wand than thick, coily hair will to a set of rag curlers. Knowing your texture lets you pick the method that gives you waves without unnecessary damage.
What hair types respond best to waves?
Generally, medium‑to‑thick hair holds waves the longest because there’s more natural texture to “grab” onto. Fine hair can still achieve gorgeous waves, but it needs lighter products and less heat. If you’re unsure, run a finger through a damp section—if it feels a bit “squishy” rather than slick, you probably have some hidden wave potential.
How long should my hair be for each method?
Most DIY methods need at least 2–3 inches of length to create a visible curl. Heat‑free tricks like overnight braids work best on hair that’s at least shoulder‑length, while a flat‑iron can generate waves on as little as 1‑inch hair if you’re comfortable with short‑style techniques.
What are the common damage pitfalls?
Heat is the biggest culprit—excessive temperature can strip protein, leaving hair brittle. Even no‑heat methods can cause breakage if you pull too tightly or leave wet hair in braids for too long. The golden rule: moisture + gentle handling = healthy waves.
| Hair Type | Best Heat‑Free Method | Best Heated Tool | Maintenance Frequency |
|---|---|---|---|
| Fine/Straight | Overnight Braids | Curling wand (low heat) | Light brushing 2×/wk |
| Medium/Wavy | Twist‑and‑Roll | Flat‑iron (medium) | Deep‑condition weekly |
| Thick/Coily | Rag Curlers | Diffuser + low‑heat wand | Moisturize daily |
Heat‑Free Ways
If you’re allergic to heat or just want to give your strands a break, these no‑heat techniques are perfect for a quick, low‑cost wavy hair DIY.
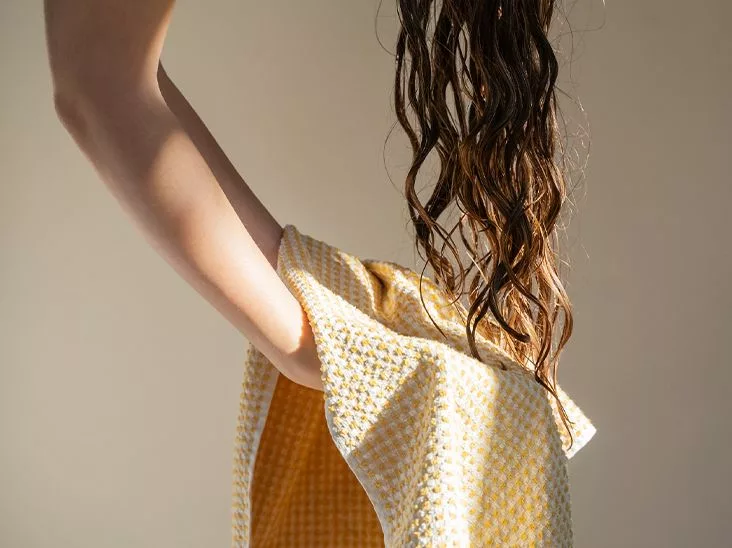
Overnight Braids & Twist‑And‑Roll
Start with clean, damp hair. Split it into three equal sections and braid each one loosely—think “messy beach braid,” not a tight rope. Secure the ends with soft scrunchies, then go to bed. In the morning, gently unwind the braids and run your fingers through the softened loops. You’ll get soft, natural waves that stay put for a few days.
Rag Curlers & Sock Bun Method
Grab an old cotton rag or a clean sock, roll a damp section of hair around it, and secure with a small clip. Let the curls air‑dry (or speed up with a cool‑setting dryer). Once dry, remove the rag and fluff with fingertips. This method works great for longer hair and gives you defined, “roller‑curls‑minus‑the‑heat” vibes.
The “Sock‑It‑To‑Me” No‑Heat Twist
Take a small section, twist it tightly, then wrap it around a small sock or tube and pin it. Repeat across the head, let it sit for about 30 minutes, then release. The result? Subtle, textured waves that look like you just stepped off a surfboard.
Plop & Diffuse for Natural Waves
Apply a curl‑enhancing mousse to damp hair, flip your head over a soft cotton T‑shirt, and “plop” the hair into the fabric, allowing it to absorb excess water while the curls form. Finish with a low‑heat diffuser, scrunching gently. According to Healthline, the plop method reduces frizz by up to 30 % and locks in bounce.
Heat Styling
When you need waves fast—like for a date night or a last‑minute photoshoot—heat tools are your best friends. The key is to protect your hair while you work.
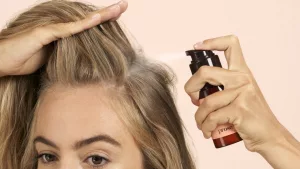
Curling Wand Basics
Pick a barrel size between ¾‑1 inch for loose beach waves. Spray a heat‑protectant (look for silicone‑based formulas with vitamin E), then wrap small sections around the wand, alternating the direction of the curl for a more natural look. Let each curl cool before you release it; the cooling helps the wave set.
Flat‑Iron Waves – The Twist‑Clamp Trick
Section your hair, twist each piece into a loose rope, then clamp the flat‑iron near the roots, moving down to the ends. Release and gently shake the wave loose. This method works especially well on medium‑length hair and gives a “soft‑glam” finish.
Blow‑Dry + Diffuser + Scrunch
Start with a lightweight curl‑defining cream, then flip your head upside down and scrunch the roots with your hands while a diffuser dries. Finish with a cool‑shot blast to lock the shape. This technique adds volume without the crunchy feel of a hairspray.
Safety Checklist (Heat‑Related Risks)
- Always apply a heat protectant.
- Keep the temperature under 180 °F for fine hair.
- Limit heat styling to 2–3 times per week.
- Follow each session with a deep‑condition treatment.
A study from John Frieda shows that using a heat protectant reduces protein loss by roughly 40 % compared with styling without protection.
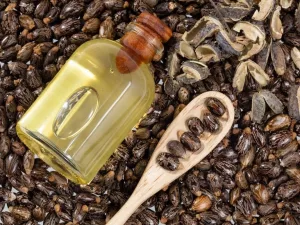
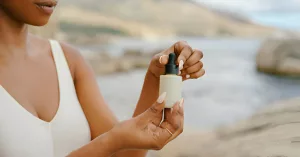
Must‑Have Products
Even the best technique can fall flat without the right products. Below is a short list of tried‑and‑tested items that keep your waves looking fresh without weighing them down.
| Product | Key Benefit | Recommended Hair Type | Price Range |
|---|---|---|---|
| John Frieda Dream Curls Air‑Dry Foam | Adds texture & hold | All lengths | $12‑$14 |
| OGX Sea Salt Spray | Beach‑y texture | Fine‑medium | $7‑$9 |
| Oribe Dry Texturizing Spray | Ultra‑light hold | Thick/Coily | $35‑$40 |
When you’re shopping, look for products that are lightweight and frizz‑fighting. Overly heavy formulas can weigh down the wave pattern and cause an unwanted flat look.
Maintain Your Waves
Creating waves is just the first step—maintenance is what keeps them looking salon‑worthy day after day.
Daily Brushing & Wave‑Direction Technique
Grab a soft‑bristle wave brush and glide it through your hair 2–3 times a day, always moving in the same direction (usually from the crown toward the nape). This trains the hair to lay in that wave pattern and reduces breakage.
Night‑time Care (Durag, Silk Pillowcase)
Wrap your hair in a silk or satin durag before bed. The smooth surface prevents friction that would otherwise turn your waves into a frizzy mess. A silk pillowcase works just as well if you don’t own a durag.
Weekly Deep‑Condition & Bond‑Multiplier Treatments
Heat styling can weaken the protein bonds in your hair. A weekly deep‑condition mask, followed by a bond‑multiplier (like a keratin‑boost serum), helps rebuild strength and keeps the wave pattern intact.
Do‑and‑Don’t Quick List
- Do: Refresh with a light mist of water + a curl‑cream before an event.
- Don’t: Over‑wash; stripping natural oils makes waves limp.
According to wikiHow, using a silk pillowcase can increase wave longevity by up to 50 %.
Real‑World Success Stories
Nothing beats hearing how real people turned strangers into wave fans.
College Student Turned Beach‑Babe
“I’m a sophomore with super straight hair, and I was skeptical about the overnight braid trick. After the first night, my hair woke up with soft, beachy curls that lasted a whole week. I even got compliments on ‘natural’ waves during a group project!” – Maya, 20.
Stylist’s 360‑Wave Miracle
“My client had 4C hair and wanted defined 360 waves. We started with a short trim, applied a moisturizing shampoo, then used a low‑heat flat‑iron in a circular motion twice a week. Adding a nightly durag kept the pattern sharp for months.” – Carlos, Certified Cosmetologist.
Sharing anecdotes like these not only shows you can trust the methods, but also reminds you that every hair journey is unique—and yours can be just as successful.
Quick‑Start Cheat Sheet
- Fastest Heat‑Free: Overnight braids (30 min prep, waves by morning).
- Quick Heat Method: Curling wand with 10 sec per section.
- Best for Fine Hair: Plop + diffuser, light mousse.
- Best for Thick Hair: Rag curlers or flat‑iron with medium heat.
- Everyday Care: Soft brush, silk durag, weekly deep‑condition.
Feel free to print this cheat sheet and stick it on your bathroom mirror—consider it your personal wave‑coach.
Conclusion
Getting wavy hair is less about magic and more about understanding your texture, choosing the right technique, and taking care of each strand like a friend. Whether you reach for a cotton rag, a curling wand, or a trusty diffuser, the steps above give you a roadmap to beach‑ready waves that last. So pick a method, gather a couple of products, and give your hair the love it deserves. Your next wave‑filled selfie is just a few twists away!


Leave a Reply
You must be logged in to post a comment.