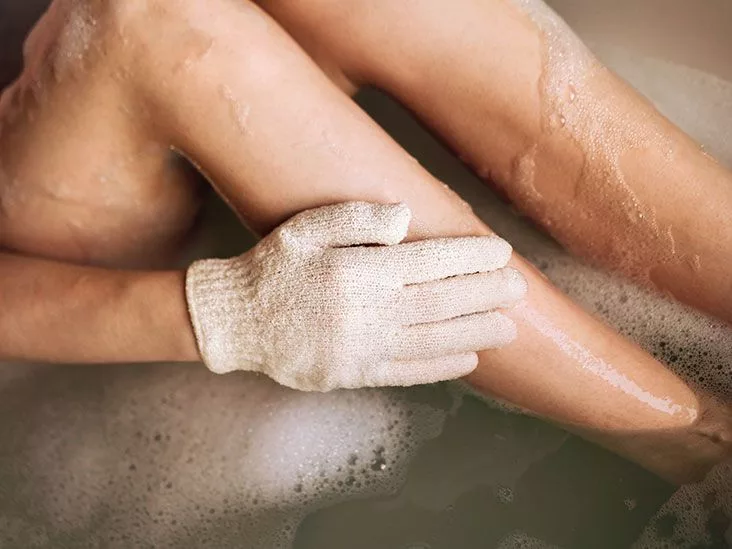
Hey there! If you’ve ever stared at a pair of exfoliating gloves and wondered whether they’re worth the hype, you’re in the right place. I’ll walk you through everything you need to know about glove exfoliation—from the moment you slip them on to the glow you’ll see in the mirror. Think of this as a friendly chat over a cup of tea, where I’ll share tips, warnings, and a few personal stories so you can feel confident using them without any guesswork.
Quick Answer Guide
Here’s the ultra‑concise version that you can skim in a flash. Follow these five steps and you’ll be on your way to buttery‑soft skin.
| Step | What to Do |
|---|---|
| 1. Prep | Warm shower or soak 2‑3 minutes to open pores. |
| 2. Wet Glove | Rinse the glove under lukewarm water until it feels supple. |
| 3. Add Product | Apply a body scrub, shower gel, or DIY mix to the glove. |
| 4. Massage | Use gentle circular motions (30‑60 seconds per area). |
| 5. Rinse & Moisturise | Wash away residue, pat dry, then apply lotion or oil. |
That’s it! If you stick to these basics, you’ll avoid over‑scrubbing and still get that silky finish.
Benefits and Risks
Before we dive deeper, let’s talk about why you might want to add exfoliating gloves use to your routine—and what could go wrong if you’re not careful.
Core Benefits
- Brighter, smoother skin: Removing dead cells reveals the fresh layer underneath, making complexion look more even.
- Better circulation: The gentle friction stimulates blood flow, which can give your skin a natural radiance.
- Prep for other products: Your moisturizer, self‑tanner, or shave will slip on more easily and work better.
Potential Downsides
Exfoliation is a bit like using a sandpaper on wood—you want it smooth, not shredded. Over‑doing it can cause redness, irritation, or even damage the skin barrier. Here’s how to keep things gentle:
- Limit deep‑scrubbing to 1‑2 times a week for dry skin, 2‑3 times for normal or oily skin.
- Start with light pressure; you can always increase a little later.
- Choose a softer glove (silk or fine nylon) if you have sensitive skin.
According to the American Academy of Dermatology, physical exfoliation should never feel painful—just a pleasant, mild rasp.
Choosing the Right Glove
Not all gloves are created equal, and the material you pick will shape both the experience and the results. Below is a quick rundown of the most common fabrics.
Material Comparison
- Silk (Turkish silk): Ultra‑gentle, perfect for sensitive areas like the face or neck.
- Nylon/Polyester blend: Ideal for rough spots such as elbows, knees, and heels.
- Cotton or mesh: Budget‑friendly but may wear out faster.
- Micro‑fibre: Gives a balanced texture—soft enough for daily use, firm enough for a deeper scrub.
How to Spot Quality
Look for a dual‑sided design—one side smooth for gentle cleansing, the other textured for deeper exfoliation. Seam‑free stitching is also a plus because it prevents snagging your skin.
DIY Exfoliating Gloves
If you love a hands‑on project, try making a DIY exfoliating glove. Mix 1 cup of sugar with 1 tablespoon of coconut oil and a couple of drops of your favorite essential oil. Spread the blend over a clean glove, let it dry, and store it in a breathable bag. It’s a fun, inexpensive way to control the coarseness of the texture.
Need a quick visual guide? Check out this step‑by‑step glove usage guide from Grove—they break it down into three simple steps that match what we’ll cover next.
Step‑by‑Step Process
Now that you’ve got the right glove, let’s walk through the entire ritual, from start to finish.
Pre‑Exfoliation Prep
Some brands, like The Banyo, advise no soap before you slip on the glove. The idea is to keep natural oils on the surface so the glove can “grab” dead cells more effectively. If you prefer a clean start, a quick rinse with warm water works just fine.
The Banyo Ritual (Summary)
1. Cleanse: Hot water only, no soap.
2. Wet the glove: Soak until it feels firm.
3. Scrub: Long, firm strokes until you see skin shedding.
4. Shower & Pat‑dry: Rinse, then gently tap skin dry.
5. Nourish: Finish with a body oil or mist for extra glow.
Application Techniques by Body Zone
| Body Part | Pressure | Time | Extra Tips |
|---|---|---|---|
| Legs & Feet | Medium | 45 sec | Finish with extra pressure on calves and heels. |
| Arms & Underarms | Light | 30 sec | Small circles; avoid the delicate underarm skin. |
| Back | Medium‑High | 60 sec | Use both hands; a long‑handled brush can help reach the centre. |
| Face (optional) | Very Light | 15‑20 sec | Only if the glove is labeled “facial”; use a silk side. |
Start at your feet and work upward—this direction also encourages lymphatic drainage, giving you that “after‑spa” light‑headed feel.
Post‑Exfoliation Care
Once you’ve buffed away the dull layers, rinse thoroughly with lukewarm water. Pat – don’t rub – your skin dry to avoid micro‑tears. Then, within three minutes, apply a moisturizer or body oil. The skin is most receptive right after exfoliation, so this step locks in hydration and prolongs that fresh‑out‑of‑the‑spa feeling.
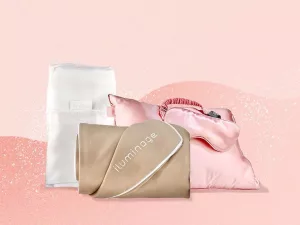
For a luxe finishing touch, many spa‑goers love a light mist of a body spray (think Banyo Body & Facial Mist) to seal in moisture and add a subtle fragrance.
Frequency and Routine
How often should you be using these gloves? The answer depends on your skin type and the side of the glove you’re using.
How Often?
- Soft side only (cleanse): Daily is fine; it’s essentially a washcloth.
- Deep‑scrub side: 1‑2 times/week for dry skin; 2‑3 times/week for normal/oily skin.
Pairing with Other Skincare Steps
Think of exfoliation as the “unlock” button for the rest of your routine. After you scrub, apply serums, oils, or self‑tanner—your skin will soak them up like a sponge. Avoid mixing chemical exfoliants (AHA/BHA) in the same shower; the combination can be too harsh.
Cleaning and Longevity
Keeping your glove fresh is essential not just for hygiene but also for performance.
Every‑Use Rinse
After each session, rinse the glove under warm water, squeeze out excess moisture, and hang it to air‑dry. No need for soap every time—just make sure there’s no product residue left.
Weekly Deep Clean
Soak the glove in a bowl of equal parts water and white vinegar for 10 minutes, then rinse thoroughly. This kills any lingering bacteria and keeps the texture fresh.
When to Replace
Look for frayed edges, loss of texture, or a persistent odor. Most gloves stay effective for 3‑6 months with regular care. If you notice the gloves no longer “grab” dead skin, it’s time for a new pair.
Real World Experiences
Let me share a quick story: a few months ago I was battling “sandpaper legs” after a long hike. I grabbed my nylon‑blend glove, followed the steps above, and in just two sessions my skin went from flaky to velvet‑soft. The best part? My friends kept asking what new body lotion I was using—little did they know the real hero was the glove.
Another friend with sensitive skin tried a silk glove on her face (only the smooth side). She reported a faint pink glow but no irritation—a perfect example of how choosing the right material can make all the difference.
Expert Scientific Backing
Research backs up what we’re doing in the bathroom. A 2023 study in the Journal of Dermatological Science found that regular mechanical exfoliation improves the skin barrier’s ability to retain moisture by up to 22 %.1 The same paper notes that over‑exfoliation can compromise the barrier, which is why the frequency guidelines above matter.
Also, the American Academy of Dermatology recommends pairing a physical exfoliant with a gentle cleanser to enhance product absorption without stripping natural oils.
Quick‑Reference Cheat Sheet
Print this out or save it on your phone for a fast reminder when you’re in the shower.
| Step | Action |
|---|---|
| 1. Prep | Warm shower 2‑3 min |
| 2. Wet Glove | Rinse until supple |
| 3. Add Product | Scrub or shower gel |
| 4. Massage | Circle, 30‑60 sec/area |
| 5. Rinse | Wash off residue |
| 6. Moisturise | Lotion or oil within 3 min |
| 7. Clean Glove | Rinse daily, deep clean weekly |
Conclusion
There you have it—the full scoop on exfoliating gloves use from start to finish. By following the simple five‑step routine, picking the right material, and respecting the recommended frequency, you’ll enjoy smoother, brighter skin without the risk of irritation. I hope you feel confident enough to slip on a pair tonight and treat yourself to a mini‑spa session.
Got your own glove‑story or a favorite DIY scrub recipe? Share it in the comments below—I love hearing how others make the most of this affordable beauty tool. And if you found this guide helpful, feel free to subscribe for more skin‑care tips, product deep‑dives, and occasional behind‑the‑scenes anecdotes. Happy exfoliating!


Leave a Reply
You must be logged in to post a comment.