Ever catch yourself slouching in front of the TV and wonder, “When did I become a human pretzel?” You’re not alone. The good news? You can hit the reset button right now with a handful of exercises to prevent stooping. In the next few minutes we’ll dive into why our bodies start to hunch, which muscles need a little love, and a friendly, step‑by‑step routine you can start today. No fancy equipment, no jargon—just real‑world tips that actually work.
Why Stooping Happens
First, let’s peek under the hood. As we age, muscle fibers shrink, bones lose density, and our daily habits (think endless scrolling or long‑hour desk work) pull us forward. According to Healthline, the combination of a weak core, tight hip flexors, and rounded shoulders creates a perfect storm for that dreaded “hunchback” look—clinically known as hyperkyphosis.
When the core can’t brace the spine, the back muscles over‑compensate, and the neck leans forward to keep the eyes level. It’s a chain reaction: weak multifidus and erector‑spinae → shoulders roll forward → chin pops out. Over time, this posture drains energy, irritates joints, and even makes breathing a little shallower.
So, what’s the shortcut? Strengthen the right muscles, stretch the tight ones, and teach your body the habit of standing tall. Let’s break it down.
Core Foundations
What core muscles protect against stooping?
The core isn’t just six‑pack abs. Think of it as a corset made of the transverse abdominis, internal & external obliques, rectus abdominis, and the deep back muscles (multifidus and erector‑spinae). When these work together, they keep the spine aligned and relieve the load on the upper back.
Core‑Targeted Moves (3‑minute daily routine)
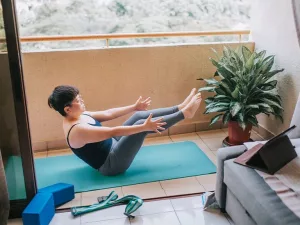
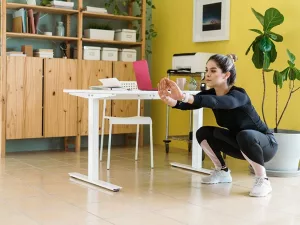
Pick any quiet spot—kitchen, office, or your favorite armchair. Perform each move with intention, focusing on breathing and form.
- Twist – Stand or sit with feet hip‑width apart. Keep your hips stable, rotate the torso to the right, then return to center and repeat left. Aim for 10‑25 twists each side.
- Forward Crunch – From standing, cross your arms over your chest, engage the core, and gently lean forward while keeping the back straight. You’ll feel a stretch in the lower back; repeat 10‑20 times.
- Side Bend – Place one hand on your hip, raise the opposite arm overhead, and lean laterally. Switch sides after 10‑25 reps.
These three exercises tick all the boxes for core activation without stressing the neck—something Healthline warns against when people over‑do traditional crunches.
Upper‑Body Alignment
How do tight chest muscles pull you forward?
Imagine trying to sit in a chair that’s too narrow—your shoulders would naturally slump. A tight pectoral floor does the same to the spine, forcing the shoulders to round and the head to jut out.
Shoulder‑Blade Squeeze (Scapular Retraction)
1. Stand tall, feet shoulder‑width apart.
2. Roll shoulders back, then squeeze the shoulder blades together as if you’re trying to hold a pencil between them.
3. Hold for 10 seconds, release, and repeat three times.
Physical therapist Jennifer Miller recommends doing this movement several times a day to keep the upper back strong and the chest relaxed.
Chest‑Opening Variations
Try any of these—pick the one that feels best today.
- Wall Angels – Back, head, and hips pressed to a wall, arms forming a “W” then raising to “Y”.
- Doorway Stretch – Place both forearms on a door frame, step forward gently, and feel the chest open.
- Chest Expansions – Stand, arms at sides, open them wide while keeping palms forward, then bring them together. This move was highlighted by Atlas Chiropractic as a staple for seniors.
Neck‑Care: Chin Tucks & Head Retraction
1. Sit or stand with a straight spine.
2. Gently tuck the chin toward the chest, creating a double‑chin effect.
3. Hold for 15 seconds, repeat 5‑10 times.
This simple exercise counters the forward head posture that often accompanies stooping. A study in the Journal of Orthopedic Sports & Physical Therapy showed that consistent chin tucks improve cervical alignment within six weeks.
Hip & Lower‑Back Mobility
Which hip muscles affect posture?
The iliopsoas (hip flexor) and the glutes are the tug‑of‑war partners for your pelvis. Tight hip flexors yank the pelvis forward, while weak glutes fail to pull it back, leading to an anterior tilt and a slouched upper back.
Hip‑Flexor Stretch (Standing Lunge)
1. Step one foot back into a low lunge, keeping the front knee over the ankle.
2. Tuck the pelvis slightly and feel a stretch along the front of the back leg.
3. Hold 30‑60 seconds, then switch sides.
These steps mirror the “Hip flexor stretches” described on M4LPT, a reliable source for mobility tips.
Glute Activation (Prone Extensions & Bridges)
1. Prone Extension – Lie on your stomach, hands near shoulders, lift chest off the floor while keeping the neck neutral. Hold three seconds, repeat 10 times.
2. Glute Bridge – Lie on your back, knees bent, feet hip‑width apart. Drive through the heels, lift hips toward the ceiling, squeeze the glutes, and lower slowly. Perform 12‑15 reps.
These moves strengthen the posterior chain, balancing the pull of tight hip flexors and helping you stand taller.
Daily Routine – 9‑Exercise Power Set
Ready to roll? Below is a quick‑reference table you can print or keep on your phone. Do the whole set once a day, or split it into a morning and evening session. Consistency beats intensity every time.
| # | Exercise | Primary Target | Reps / Duration | Quick Tip |
|---|---|---|---|---|
| 1 | Twist | Obliques & thoracic rotation | 10‑25 each side | Keep hips square, move from the rib cage |
| 2 | Forward Crunch | Core stabilization | 10‑20 | Chest up, avoid neck strain |
| 3 | Side Bend | Lateral flexors, core | 10‑25 each side | Light dumbbell optional (5 lb) |
| 4 | Shoulder‑Blade Squeeze | Upper back | 3 × 10 sec hold | Imagine holding a pencil between blades |
| 5 | Standing Row (band) | Mid‑back | 12‑15 | Pull elbows toward hips, squeeze scapula |
| 6 | Elbow Curl (light dumbbell) | Biceps (arm support) | 12‑15 | Keep shoulders relaxed |
| 7 | Wall Angel | Shoulder mobility | 10‑12 | Back, head, and hips flat against wall |
| 8 | Hip‑Flexor Stretch | Hip flexors | 30‑60 sec each side | Gentle tuck of pelvis |
| 9 | Glute Bridge | Glutes & lumbar spine | 12‑15 | Drive through heels, avoid arching lower back |
That’s it—nine moves, under ten minutes. Feel free to swap a move for a similar one if something feels uncomfortable. The goal is to keep moving, not to get stuck in a perfection trap.
Progress & Safety
How to measure improvement
Grab a ruler and do the “wall test” that Bob & Brad showed in their video: stand with heels, butt, and head touching a wall, then measure the gap between the back of your head and the wall. Most people start around 9 inches; a 1‑2 inch reduction in a month signals real progress.
Red‑Flag Signals – When to Pause
Listen to your body. Stop immediately if you feel sharp pain, dizziness, or a sudden increase in back discomfort. Those signs call for a quick check‑in with a physiotherapist—especially if you have osteoporosis or a recent injury.
Expert Resources & Further Reading
- For more science‑backed tips, see the International Osteoporosis Foundation’s guidance on posture and bone health.
- Healthline’s comprehensive list of posture‑improvement exercises offers visual demos.
- If you prefer a research perspective, a recent study in the Journal of Orthopedic Sports & Physical Therapy highlights the benefits of back‑extension exercises for older adults.
Wrap‑Up: Take the First Step Today
We’ve covered the why, the where, and the how of standing tall. Remember the three‑step recipe:
- Identify the gap with the wall test.
- Activate your core, back, shoulders, and hips using the 9‑exercise set.
- Maintain the habit by checking progress weekly and adjusting as needed.
Give yourself a pat on the back for even reading this far—knowledge is the first muscle you can flex. Now, why not try the first two moves right after you finish this article? You’ll feel a subtle lift in your chest and a whisper of confidence that says, “I’ve got this!”
Got questions, success stories, or a favorite stretch you swear by? Drop a comment below, and let’s keep the conversation rolling. Together we’ll turn “stooping” into “standing proud.”








Leave a Reply
You must be logged in to post a comment.