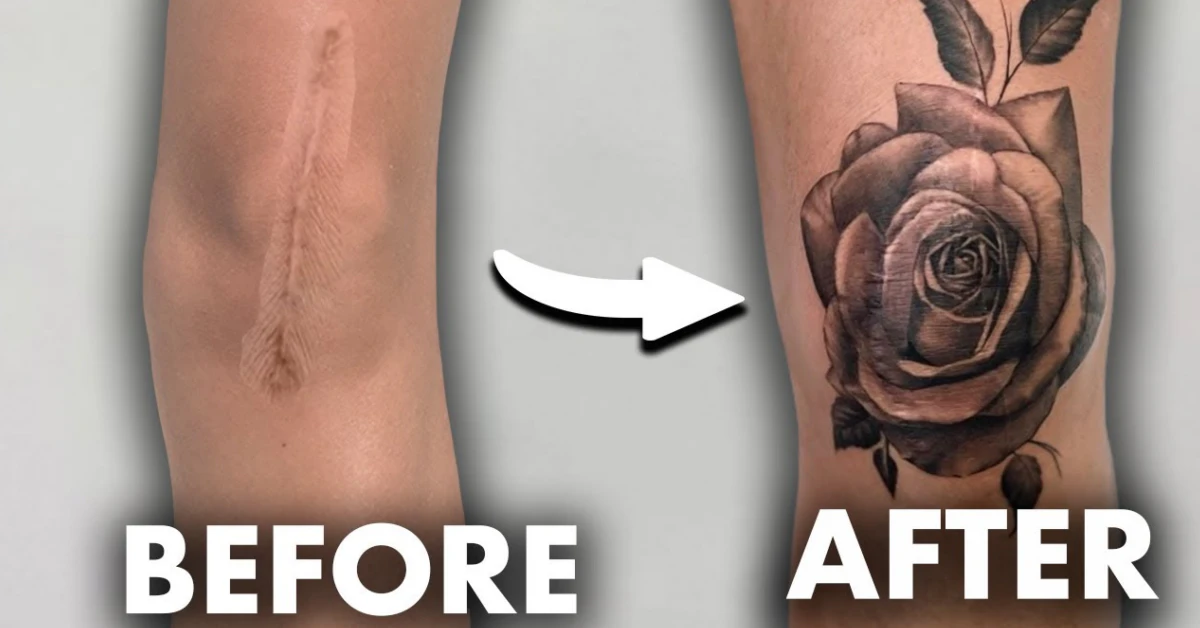
Got a fresh piece of ink and you’re wondering, “Is that a scar or just my skin healing?” Short answer: if the bump, itch or discoloration sticks around past the normal two‑week window, you’re probably looking at tattoo scarring. The good news? You can tell the difference, keep it from getting worse, and even soften it with the right steps.
In the next few minutes we’ll walk through exactly what tattoo scarring looks like, why it shows up, how to keep it at bay, and which treatments actually work. By the end you’ll know when to keep caring at home and when it’s time to call in a professional. What does tattoo scarring look like is a quick reference you can bookmark as you read.
What Scarring Looks Like
Visual cues that set scars apart from normal healing
During the first week after you sit in the chair, a little redness, swelling and a thin scab are totally expected – think of it as the skin’s “construction zone” sign. A scar, however, announces itself in a different language:
- Raised, bumpy spots that feel like tiny hills under your fingertips.
- Sunken pits or uneven depressions where the skin looks as if it was pressed into a waffle.
- Persistent pink‑to‑red hue that doesn’t fade after the scab falls off.
- Itchiness or tenderness that lasts weeks beyond the usual healing itch.
These signs are the body’s way of telling you it’s laying down extra collagen – the protein that builds scar tissue. If you catch them early, you have a better chance of steering the scar toward a smoother finish.
Does tattoo scarring go away on its own?
Scars rarely disappear completely, but they do tend to mellow over time. A typical hypertrophic (raised) scar might shrink 30‑50% in the first six months, while an atrophic (sunken) scar can stay relatively consistent unless treated. Factors that speed up fading include:
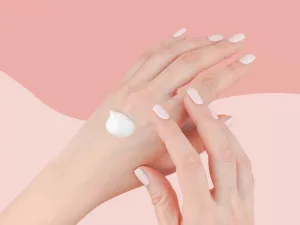
- Keeping the area moisturized and protected from UV light.
- Gentle massage that encourages collagen remodeling.
- Early intervention with topical silicone or medical‑grade ointments.
In other words, “just wait and see” isn’t the most helpful answer. Proactive care makes a noticeable difference, and that’s why tattoo scarring while healing deserves a dedicated routine.
Why Scarring Happens
Deep‑needle trauma – “too deep tattoo scarring”
When needles plunge beyond the dermis (the skin’s middle layer) they cause a larger wound than necessary. The body reacts by flooding the area with collagen, which can turn into a raised or thickened scar. This is often called “too deep tattoo scarring.” The deeper the injury, the more likely the skin will over‑repair.
Heavy‑handed or inexperienced artists
Even a seasoned artist can accidentally overwork a spot by repeatedly passing over the same area or applying excess pressure. The result is an “over‑worked” scar that shows up as a raised line or a darkened patch. In a quick anecdote, a friend of mine got a detailed sleeve; the artist kept re‑shading a thin line until the skin looked puffy – months later that line turned into a noticeable keloid. The lesson? Choose a tattooist with a solid portfolio and good reviews for clean, precise work.
Poor after‑care habits
After you leave the studio, you become the primary caretaker of your ink. Scratching, picking scabs, or soaking the tattoo in hot tubs can strip away the protective layer that the skin is trying to rebuild. Those actions not only delay healing but also expose fresh tissue to infection, which dramatically raises the risk of scar formation.
Real‑world case study
Emma, a university student, came in with a small tribal tattoo that looked perfect at day 5, but by week 3 it had become a reddish ridge. She admitted to picking at the scab whenever it flaked. After a dermatologist prescribed a silicone gel and taught her gentle massage, the ridge flattened by 40% in three months. Her story illustrates how a simple habit can tip the balance from normal healing to scar tissue.
Curious about the connection between tattoo removal and scarring? A quick look at Does tattoo removal leave scars can help you decide if laser removal is worth the risk.
Types of Scarring
Raised tattoo scarring (hypertrophic/keloid)
These scars feel like tiny hills and often appear red or pink. Hypertrophic scars stay within the bounds of the original tattoo, while keloids can spread well beyond it, sometimes looking like rubbery cords. People with darker skin or a family history of keloids are especially prone.
Sunken (atrophic) scarring
Atrophic scars create little valleys in the skin. They happen when the dermis is damaged but not enough collagen is produced to fill the gap. The result is a “pitted” look that can distort color saturation, making the ink appear lighter in those spots.
Mixed‑type scars
It’s possible to have both raised and sunken areas in the same tattoo, especially when different sections were treated differently during the session. Mixed scars often need a combination of treatments.
Comparison table
| Type | Look & Feel | Typical Causes | Best Treatments |
|---|---|---|---|
| Raised (hypertrophic/keloid) | Bumpy, firm, red/pink; stays within tattoo lines (keloid may spread) | Deep needle trauma, heavy pressure, genetic predisposition | Silicone sheets, steroid injections, laser resurfacing |
| Sunken (atrophic) | Pitted, lighter ink in the dip | Insufficient collagen, infection, picking at scabs | Microneedling, dermal fillers, collagen‑stimulating lasers |
| Mixed | Combination of bumps and pits | Variable technique, uneven after‑care | Tailored mix of the above |
Prevention – Keep Your Ink Scar‑Free
Pick the right artist
Do a little homework before you book. Look for:
- Clear, healed examples of similar work.
- Positive client testimonials about after‑care instructions.
- Evidence of a clean, licensed studio.
When you feel confident in the artist’s skill, you’re already cutting down the risk of “too deep tattoo scarring.”
Optimal after‑care routine
Here’s a quick, friend‑to‑friend checklist (you can even download a printable version later):
- First 24 hours: Keep the bandage on, avoid submerging the tattoo in water, and use a gentle, fragrance‑free cleanser if you must wipe.
- Days 2‑7: Lightly wash with lukewarm water, pat dry, then apply a thin layer of a fragrance‑free, petroleum‑based ointment (e.g., Aquaphor). Switch to a fragrance‑free moisturizer after the ointment is absorbed.
- Weeks 2‑4: Continue moisturizing, add a broad‑spectrum SPF 30+ sunscreen whenever the tattoo is exposed.
- Beyond month 1: Keep the skin hydrated and protected from the sun; consider silicone gel if any raised texture appears.
Red‑flag symptoms to watch
If you notice any of these, it’s time to pause the DIY routine and seek professional advice:
- Increasing pain, swelling, or warmth after the first week.
- Yellowish discharge or foul odor – signs of infection.
- Scab that refuses to fall off or re‑forms repeatedly.
- Rapid spreading of dark or raised tissue beyond the original design.
Quick tip
Set a reminder on your phone to check the tattoo every night for the first month. A quick visual note helps you catch changes before they become entrenched.
Treatment Options for Existing Scars
Over‑the‑counter remedies
Many people start with what’s at hand:
- Silicone gel or sheets – the gold standard for raised scars; apply nightly for 8‑12 weeks.
- Vitamin E oil – mixed results; some users report improvement, others see no change.
- Aloe vera – soothing, anti‑inflammatory, but not a scar‑remover per se.
While these options are safe, they work best on fresh, mild scars. Patience is key – give each product at least a month before judging effectiveness.
Prescription/topical therapies
When OTC stuff isn’t enough, dermatologists may prescribe:
- Topical steroids (e.g., triamcinolone) – reduce inflammation and flatten hypertrophic scars.
- 5‑Fluorouracil (5‑FU) cream – interferes with excess collagen production, especially useful for stubborn keloids.
According to a 2021 dermatology study, combined steroid + 5‑FU therapy reduced raised scar volume by up to 60% after three monthly applications.Healthline also notes that these treatments should be supervised to avoid skin thinning.
Professional procedures
When you’re ready to go beyond creams, consider these clinic‑based options:
- Laser resurfacing (fractional CO₂ or pulsed‑dye lasers) – targets excess collagen and smooths texture.
- Microneedling – creates controlled micro‑injuries that stimulate healthy collagen remodeling; often paired with topical growth factors.
- Dermal fillers – for atrophic pits, hyaluronic‑acid fillers can raise the depressed area, making the tattoo look even again.
- Surgical revision – rarely needed, but for severe keloids a dermatologist might excise the scar and re‑suture the skin.
Laser treatment is generally the most versatile; however, it does carry a tiny risk of pigment loss, especially on darker inks. Always discuss laser settings with a board‑certified dermatologist experienced in tattoo work.
Decision flowchart (quick guide)
Fresh, raised bump → start silicone gel.
After 8 weeks, still raised → see dermatologist for steroid + 5‑FU.
Persistent or spreading → laser or microneedling under professional care.
Deep pits after healing → consider fillers or microneedling.
When to Seek Professional Help
Red‑flag symptoms that need a doctor
If any of these appear, make an appointment promptly:
- Intense, lingering pain or throbbing beyond two weeks.
- Rapid growth of a raised area (keloid‑like).
- Signs of infection: pus, fever, spreading redness.
- Significant color distortion that won’t improve with after‑care.
Who to consult
Start with a board‑certified dermatologist; they can diagnose the scar type and prescribe medical‑grade treatments. If the scar is mild but you’re interested in laser work, look for a clinic that specializes in tattoo laser removal – they’ll understand how to protect the remaining ink. For complex keloids, a plastic surgeon or a scar‑revision specialist may be involved.
First appointment prep
Bring these items to make the visit efficient:
- High‑resolution photos of the tattoo from multiple angles.
- A timeline of when you noticed the scar and what after‑care steps you’ve taken.
- Any allergies or sensitivities (especially to steroids or silicone).
- Questions you’ve written down – e.g., “Will laser treatment affect my ink color?”
Being organized shows the clinician you’re invested and helps them tailor a plan faster.
Conclusion
Whether you’re staring at a tiny raised ridge or a faint sunken dip, tattoo scarring doesn’t have to be a permanent roadblock to loving your artwork. By learning the visual cues, understanding the why‑behind the scar, and applying a mix of smart prevention and targeted treatment, you give your skin the best chance to heal smoothly. Remember, the most powerful tool is early awareness – keep an eye on your ink during the first few weeks, follow a gentle after‑care routine, and don’t hesitate to call a professional when red flags pop up.
If you’ve ever dealt with tattoo scarring, share your story with a friend who’s about to get inked – a quick tip could save them weeks of frustration. And if you’re still unsure about any step, feel free to reach out to a dermatologist or trusted tattoo artist. Your skin, your art, your confidence – all deserve the best care.


Leave a Reply
You must be logged in to post a comment.