Got acrylic nails you need off right now? You don’t have to live with a half‑removed set or wait for a salon appointment. With the right tools and a little patience, you can remove acrylic nails at home in 15‑30 minutes—without compromising the health of your natural nails. Below you’ll find step‑by‑step methods, safety reminders, after‑care routines, and clear signs when it’s best to hand the job over to a professional. Let’s dive in and make the process painless, honest, and even a little fun.
Understanding Acrylic Removal
What exactly are acrylic nails?
Acrylic nails are created by mixing a liquid monomer with a powdered polymer. The mixture hardens into a sturdy shell that sits on top of your natural nail. Because the bond is chemically strong, the acrylic won’t simply “pop off” on its own, which is great for durability but also means you need a proper removal technique to avoid pulling or tearing the nail plate.
Why does proper removal matter?
Too many of us have tried to rip acrylics off with fingers, dental floss, or a screwdriver. The result? Thin, brittle, or even infected nails. A study published in Karger’s research on DIY nail cosmetics found that improper removal can lead to nail thinning, dryness, and a higher risk of bacterial infection. In short, when you treat your nails gently, they’ll thank you with a smooth, healthy surface.
When should you go to a salon?
There are a few red‑flag situations where a professional’s touch is the safest bet:
- Your acrylics were applied less than two weeks ago—adhesive is still super strong.
- You notice redness, swelling, or any discharge (possible infection).
- The set is extremely thick or built with “builder gel” that requires a drill.
- You simply feel uneasy about doing it yourself.
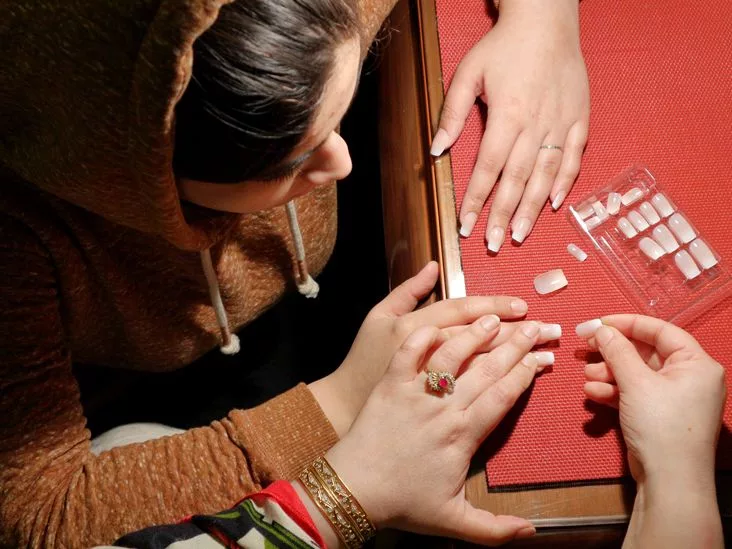
If you’re ticking any of those boxes, book a quick salon nail removal appointment. A qualified technician will use hand‑filing or a calibrated e‑drill, minimizing trauma to the nail bed.
Acetone Soak Method
What you’ll need
Gather these items before you start. Having everything at hand keeps the process smooth and prevents you from reaching for the wrong product (like regular nail polish remover, which contains added ingredients that won’t dissolve acrylic properly).
- 100 % pure acetone (the real deal—no additives).
- Cotton balls or pads.
- Aluminum foil (cut into squares big enough to wrap each fingertip).
- Coarse nail file.
- Cuticle pusher or orangewood stick.
- Petroleum jelly (optional, for skin protection).
Step‑by‑step guide
- Trim the excess. Use nail clippers to cut the acrylic down to about 2 cm above the cuticle. This reduces the amount of material the acetone has to work on.
- File the surface. Gently file the top coat of the acrylic. You’re not trying to sand it down completely—just breaking the seal so the acetone can seep in.
- Protect your skin. Dab a thin layer of petroleum jelly around the nail beds. This barrier prevents the acetone from drying out the surrounding skin.
- Soak the cotton. Saturate each cotton ball with acetone—make it dripping, not dribbling.
- Wrap and wait. Place a cotton ball on each nail, then wrap tightly with foil. Let the wraps sit for 10–15 minutes. If your acrylic set is particularly thick, you can extend the soak to 20‑30 minutes.
- Push off the softened acrylic. Remove the foil, check one nail. The acrylic should look “gooey.” Gently push it off with a cuticle pusher. If resistance remains, re‑wrap and soak a few minutes longer.
- Clean up. Wash your hands with warm, soapy water, then wipe any residual acetone with a lint‑free pad.
Troubleshooting tips
If the acrylic refuses to budge after the first soak, it often means the acetone has evaporated from the cotton. Re‑wet the cotton, re‑wrap, and give it another 5‑10 minutes. Remember, patience is key—rushing the process only increases the chance of nail damage.
Oil Soak Alternative
When to use the gentle method
The hot‑water‑and‑oil soak works best when your acrylics are already lifting, or if you have sensitive skin that reacts to raw acetone. It’s slower, but it’s kinder to dry skin and nails.
Supplies
- Warm water (not scalding).
- Cuticle oil, baby oil, or any light mineral oil.
- Small bowl.
- Nail file (fine grit).
- Cuticle stick.
Procedure
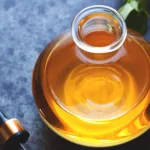
- Mix a few drops of oil into a bowl of warm water.
- Soak your nails for 20–30 minutes. The oil softens the acrylic’s bond without stripping natural oils from your skin.
- After soaking, gently lift the edges with a cuticle stick. If the acrylic still feels stubborn, repeat the soak.
- Once the bulk has come off, lightly file any remaining bits and finish with a moisturizing cuticle oil.
Safety and Aftercare
Core safety rules
Regardless of the method you choose, never:
- Pull or rip the acrylic off with your fingers.
- Use metal tools or excessive force on softened acrylic.
- Skip the protective petroleum jelly if your skin feels dry.
- Continue if you feel sharp pain—stop, re‑soak, and reassess.
Post‑removal nail care routine
Your nails will feel a bit soft after acetone or oil exposure. Giving them some TLC will speed up recovery and keep them strong for your next set.
- Moisturize. Apply a generous amount of cuticle oil (preferably with vitamin E) and a thick hand cream 2‑3 times a day for the first 48 hours.
- Buff lightly. Use a soft buffer to smooth any ridges—avoid aggressive buffing, which can thin the nail plate.
- Strengthen. Products containing keratin, biotin, or calcium can reinforce the nail. A study on nail health shows that regular use of such fortifiers reduces brittleness after acrylic removal.
- Give them a break. Let your natural nails breathe for at least two weeks before applying another set. This rest period lets the nail plate re‑hydrate and regain its natural flex.
Red flags—when to call a pro
If you notice any of the following after removal, schedule an appointment with a certified nail technician right away:
- Persistent redness, swelling, or pus.
- Severe pain that doesn’t subside after a short rest.
- Acrylic pieces that won’t soften even after 30 minutes of soaking.
- Extreme thinning or a “paper‑thin” feeling when you press the nail.
Salon vs Home
Decision guide
| Situation | Home Removal | Salon Visit |
|---|---|---|
| Fresh set (< 2 weeks) | Risk of incomplete dissolve; may need aggressive filing. | Professional drill or hand‑filing, minimal trauma. |
| Visible infection (redness, pus) | Can worsen; sterile environment needed. | Clean tools, disinfectants, medical‑grade care. |
| Very thick or builder‑gel acrylics | Long soak times, higher chance of breakage. | Powerful e‑drill with proper technique. |
| Comfort level low | Stressful, may lead to mistakes. | Relaxing experience, expert guidance. |
What to expect at a professional salon
Most nail techs start with a gentle hand‑filing to break the top coat, then use a calibrated e‑drill that removes the bulk without generating excessive heat. The whole process typically takes 15‑30 minutes and costs between $30‑$60, depending on location. The extra cost buys you a sterile environment, a trained eye for hidden damage, and a polished finish that’s ready for your next manicure.
Finding a trustworthy nail salon
Look for these hallmarks of professionalism:
- Certified technicians (check for state licensing or a reputable association).
- Visible sanitation practices—clean tools, disposable files, hand sanitizers.
- Positive client reviews that mention gentle removal and after‑care advice.
- Clear communication: the tech should explain each step and ask for your comfort level.
Expert Stories & Real‑World Tips
Sarah’s success with the acetone soak
Sarah, a freelance graphic designer, tried to remove a three‑week acrylic set after a busy project deadline. She followed the acetone‑foil method exactly, re‑soaking for an extra five minutes when the acrylic was still stubborn. After removal, she moisturized with a vitamin E cuticle oil and noticed no thinning after two weeks. “I was terrified I’d ruin my nails,” she says, “but the gentle push‑off was surprisingly painless.”
Professional insight from Lauren LaRouge
Lauren LaRouge, owner of Sydney’s “Nailed by LaRouge,” recommends always protecting the skin with petroleum jelly before the acetone soak. “Acetone can be harsh on the surrounding cuticle,” she explains, “the jelly creates a barrier that keeps it from drying out your skin while still letting the chemical work on the acrylic.” (According to Mamamia.)
Quick tip from Sherwin Hora
Certified nail tech Sherwin Hora adds: “If you sense any pain during the soak, give your nails an extra 5‑10 minutes. Pain is a sign the acrylic isn’t fully softened yet, not a sign to force it.” This simple reminder can save you from accidental nail bed injury.
Putting It All Together
Removing acrylic nails doesn’t have to be a dreaded chore. By choosing the right method—acetone soak for speed, oil soak for gentleness—following strict safety guidelines, and pampering your nails afterward, you can keep your natural nails healthy and ready for your next beauty adventure. Remember, if you ever feel uncertain, a quick salon visit is a safe fallback that protects both your nails and your peace of mind.
Have you tried any of these techniques? Did a particular tip save the day? Share your experiences in the comments below; we’d love to hear how you keep those nails happy and healthy. And if you have any lingering questions, don’t hesitate to ask—let’s keep the conversation going!


Leave a Reply
You must be logged in to post a comment.