The way you tape a knee varies based on the goal—whether it’s addressing a medical issue, providing extra support, or easing pain. The kind of tape you select also influences how you apply it.
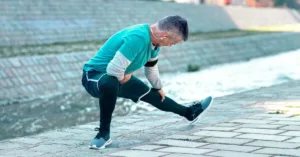
Knee taping is a common approach to reduce knee discomfort and to augment joint support, which can both treat and help prevent different injuries.
The method involves placing specialized tape around the knee at targeted spots to help control muscles and joints and thereby manage pain.
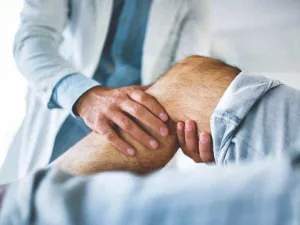
Before attempting knee taping, talk with a physical therapist or sports medicine physician for a diagnosis and treatment guidance.
Taping is an adjunct to other treatments, which may include therapeutic exercise and NSAIDs. Furthermore, multiple knee taping techniques exist, and each offers specific advantages depending on the injury.
A technique that helps one person might not be effective for you, even when the knee problem appears similar.
This article outlines four frequently used taping methods, plus necessary supplies and practical tips.

How to tape a knee for stability and support
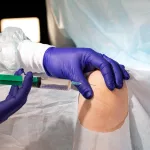
Knee taping is frequently used to boost knee stability. It can reduce pain and limit excessive motion during activity.
These techniques are commonly applied for conditions such as overuse injuries or patellofemoral pain syndrome (PFPS). PFPS describes pain around the kneecap (patella) and the groove on the thigh bone (femur) where it tracks.
Taping can also help prevent future problems by improving knee stability.
The tape should be snug enough to provide support but not so tight that it impairs circulation.
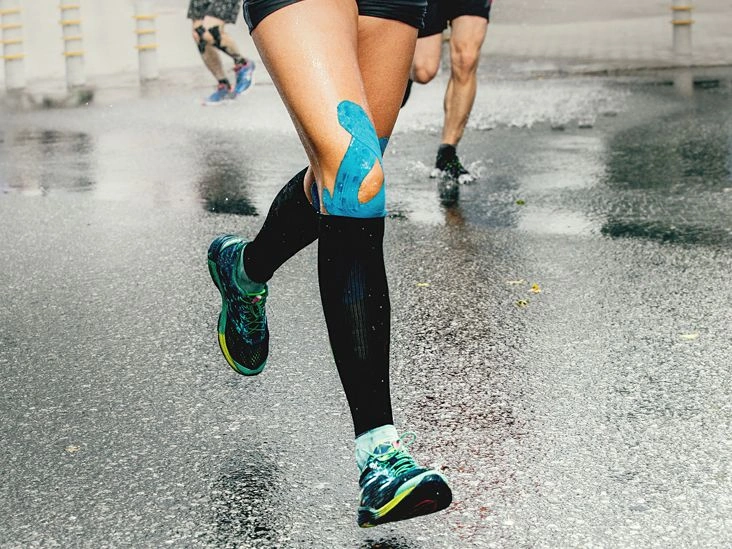
With kinesiology tape for full kneecap support
Kinesiology tape is a highly elastic sports tape thought to support joints and muscles by providing stability. Numerous brands of kinesiology tape are available.
Below is a method using kinesiology tape for full kneecap support. This approach is suited for pain around the patella (kneecap) at the front of the knee. Often called “runner’s knee,” this pain can stem from overuse or patellar tracking problems.
Supplies you will need:
- kinesiology tape
- scissors
- clean skin
Taping instructions:
- Measure from the tibial tubercle (the bump below your kneecap) up to your quadriceps tendon. Cut two strips of tape of the same length. Round the ends to reduce peeling.
- Sit on a bench and bend your knee. Remove the backing from the first inch of one strip. Anchor it outside the tibial tubercle with no stretch.
- Stretch the tape about 40%. Bring it around the inner knee following the natural curve and secure the end without stretch. Rub the tape to engage the adhesive.
- Repeat with the second strip along the outer knee, crossing the ends so they form an X.
- Cut a strip long enough to pass under the kneecap. Slightly straighten your knee.
- Peel the tape from the center. Stretch it to roughly 80% and place it beneath the kneecap. Wrap it along the hamstrings and secure the ends.
Kinesiology tape can typically remain on the skin for 3 to 5 days. Check the product packaging for exact guidance.
Watch this video of Burke Selbst from Focus Physical Therapy tape a knee for stability while skiing
With the McConnell taping technique
The McConnell technique, like kinesiology taping, aims to increase knee stability. It is intended to address patellar tracking problems and pain by offering more structural support.
Supplies you will need:
- 2-inch wide adhesive gauze (to protect the skin)
- 1 1/2-inch wide rigid non-elastic medical tape
- scissors
Taping instructions:
Begin with clean skin. To perform the McConnell taping method:
- Cut two pieces of adhesive gauze and one piece of rigid tape. Each should be long enough to cover the kneecap—around 3 to 5 inches.
- Sit on a bench. Extend your knee and relax the quadriceps. Lay both gauze strips over the kneecap.
- Anchor the non-elastic tape at the outer edge of the kneecap. Pull the strip inward toward the inner knee while simultaneously pushing the soft tissue on the inner knee toward the kneecap.
- Secure the tape’s end on the inner edge of the kneecap.
This tape is usually worn for up to about 18 hours.
Depending on your sport and symptoms, the rigid tape may be positioned differently. A physical therapist can advise on the best configuration for you.
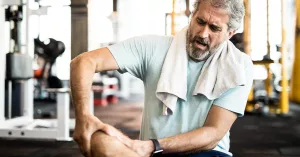
How to tape a knee for pain relief
If you’re experiencing knee pain, taping may offer relief. The techniques below are targeted to specific types of knee discomfort.
For medial knee pain
Medial knee pain happens on the inner side of the knee. Causes include:
- patellar tendonitis
- meniscus tear or sprain
- MCL injury
Supplies you’ll need:
- kinesiology tape
- scissors
- clean skin
Taping instructions:
To apply the tape:
- Cut a 10-inch strip of tape and round the ends.
- Sit on a bench with your knee bent at 90 degrees.
- Peel the first inch of tape and anchor it below the inner knee on the upper calf.
- Stretch the tape about 10% and lay it along the inner knee. Rub the tape to activate the adhesive.
- Cut two 5-inch strips and round their ends. Peel one strip from the center, stretch it to around 80%, and apply it diagonally over the painful area. Secure the end.
- Repeat with the second strip to form an “X.”
Watch Dr. Josh Jagoda from San Diego Spine and Sports Wellness demonstrate patellar tendon taping

For anterior knee pain
Pain in the front and center of the knee is called anterior knee pain. Common causes include patellofemoral pain syndrome or knee arthritis.
The first technique described in this article (for full kneecap support) is often used for anterior knee pain. You can also use a similar approach with pre-cut Y-shaped tape available online or at local pharmacies.
Supplies you’ll need:
- clean skin
- 1 long Y strip
- 1 short Y strip
Taping instructions:
To apply the Y strips:
- Cut the long Y strip to 1 to 2 feet. Sit on the edge of a bench with your knee bent.
- Peel the first inch of tape and place it in the middle of the thigh. Split the Y and remove the backing.
- Stretch the tails to 25–50% and apply them on either side of the kneecap. Rub to activate the adhesive.
- Peel the first inch of the small Y strip. Anchor it on the outer side of the kneecap, split the Y, and remove the backing.
- Stretch the tails to about 50% and place them above and below the kneecap. Rub to set the adhesive.
How to remove kinesiology tape (and other tape)
Knee tape adheres tightly to the skin. Here are suggestions for removing it comfortably when it’s time to take it off.
Tips for removing kinesiology tape
To remove kinesiology tape with less discomfort:
- Apply oil. Baby oil or olive oil can break down the adhesive. Rub oil on the tape, wait 15–30 minutes, then remove it in the shower.
- Remove it slowly. Don’t yank the tape off quickly, as this can irritate or injure the skin.
- Roll away the tape. Rolling the tape back on itself is generally less painful than pulling it straight off.
- Move in the direction of hair growth. This reduces irritation to the skin and hair follicles.
- Tug the skin. While peeling the tape, use your free hand to pull the skin away in the opposite direction to lessen discomfort.
Other types of tape
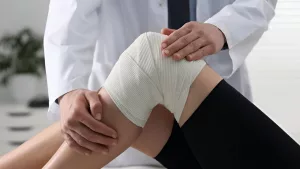
Your physical therapist may advise other materials, like adhesive gauze tape. If removal is difficult, try the tips above.
You can also:
- Take a warm bath or shower. Warm water, like oil, can help loosen the adhesive.
- Apply lotion. This may help break down sticky residue.
- Apply ice. An ice pack may assist in releasing the tape.
The takeaway
Knee taping is used to reduce pain and increase support. It can help you stay active whether you’re rehabilitating from an injury or managing discomfort. The tape should support the knee without restricting blood flow.
Because many taping strategies exist, it’s wise to consult a clinician. They can teach you the most appropriate technique and placement for your symptoms.
When used alongside a therapeutic exercise plan, knee taping can be a helpful tool for finding relief.


Leave a Reply
You must be logged in to post a comment.