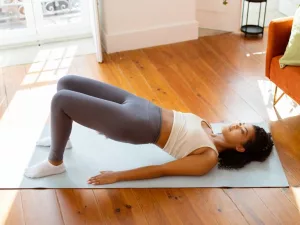
Short answer: yes, Pilates can be a safe, low‑impact way to ease pain, improve posture, and support your scoliosis journey – just not a cure‑all. In the next few minutes we’ll walk through what Pilates actually does for the spine, why many people love it, where you need to be cautious, and a simple starter routine you can try right now.
Grab a cup of tea, settle into a comfy seat, and let’s explore how moving mindfully can make a real difference in the way your back feels.
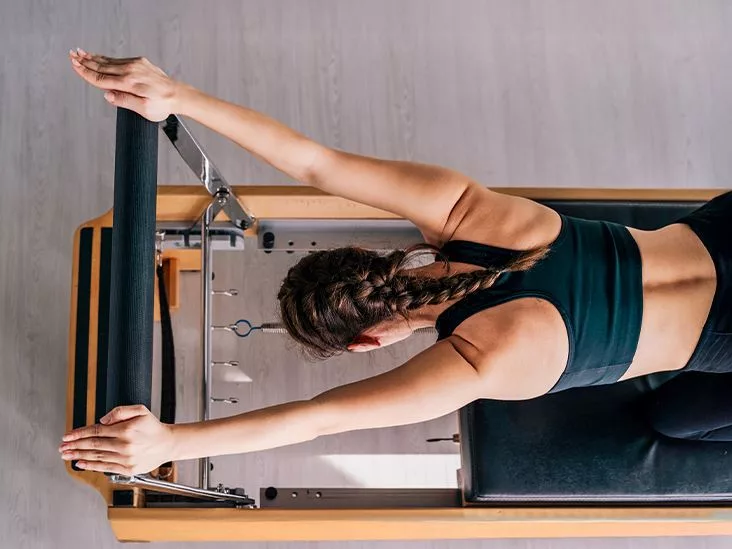
Why Pilates Helps
At its core, Pilates is all about building a strong, balanced core and learning to move with precision. That focus on alignment, breath, and control is why so many clinicians recommend it as part of NHS Pilates videos for scoliosis. When you engage the deep abdominal muscles, the pelvic floor, the diaphragm, and the back extensors together, you give your spine a more stable foundation to sit, stand, and move from.
What makes Pilates spine‑friendly?
Core‑centric philosophy
Think of your core as a “four‑pointed star” – the front (abdominals), back (multifidus & erector spinae), bottom (pelvic floor) and top (diaphragm). Pilates trains all four points simultaneously, which reduces the tug‑of‑war that a spinal curve can create.
Controlled breathing & alignment cues
Every Pilates move is paired with a breath pattern that encourages rib‑cage expansion and a neutral spine. This helps the body “find” its natural center of gravity, which is especially valuable when one side of the spine is longer or rotated.
Scientific & clinical perspective
Evidence from research
According to a review in the Asian Spine Journal, non‑operative treatments (including Pilates‑style exercises) can improve postural outcomes and reduce pain in adolescents with idiopathic scoliosis. The evidence isn’t a “miracle cure,” but the data consistently show positive functional changes.
Professional endorsement
Numerous physiotherapists and certified Pilates instructors echo these findings. For example, the team at Pilates.com notes that while “there is no research that supports claims that Pilates can reduce structural scoliosis,” the method does help decrease discomfort and increase confidence in everyday movement.
Real‑world outcomes
Client story
Emma, a 29‑year‑old graphic designer, began a twice‑weekly Pilates program after a painful “hump” appeared in her upper back. After eight weeks she reported a drop in her pain‑scale from 7/10 to 2/10, smoother breathing, and a noticeable evening‑out of her shoulders. She credits the “mind‑body connection” taught in class for turning a chronic ache into a manageable sensation.
Real Benefits
Improves postural alignment
How it works
Pilates emphasizes “spine‑centered” movement – imagine the spine as a tall, flexible pole that you’re gently coaxing back into a neutral line. This subtle correction can help balance the lateral curve, making everyday tasks feel more symmetrical.
Strengthens the core & balances muscle asymmetry
The convex vs. concave side
In scoliosis one side of the spine (the convex side) often feels tighter, while the opposite (concave) side is weaker. Pilates exercises like the bird‑dog, dead‑bug, and side‑lying clams specifically target these imbalances, encouraging the weaker side to fire without over‑loading the stronger side.
Increases flexibility & joint mobility
Targeted mobility drills
Gentle thoracic rotations, hip‑hinges, and the “rolling like a ball” adaptation (see The ScolioTherapist for a safe version) open up the ribcage and improve the range of motion that a stiff curve can otherwise limit.
Reduces pain & improves quality of life
What the numbers say
A pilot study in the Journal of Bodywork & Movement Therapies found that participants who practiced Pilates three times a week for 12 weeks reported a 40 % reduction in back pain intensity and a modest improvement in functional scores.
Boosts body awareness & mind‑body connection
Know your curve
When you learn to feel the subtle tilt of your pelvis or the shift in your ribcage, you become your own “coach.” That awareness can stop you from slipping into habits that worsen the curve, like slouching or over‑rotating during daily activities.
Low‑impact and adaptable for all ages
Props make it easier
A small wedge, a 9‑inch physio ball, or a rolled towel can soften any movement that feels too intense. The ScolioTherapist suggests a ball behind the back for a gentle roll‑up, turning a potentially risky flexion into a safe, supportive stretch.
Complementary to other treatments
Multimodal care
Most scoliosis specialists agree that the best outcomes come from a mix of bracing, physiotherapy, and targeted exercise. Pilates fits nicely alongside the Schroth method, chiropractic care, or standard physiotherapy, reinforcing core stability while you pursue other medical recommendations.
| Benefit | How Pilates Achieves It | Example Exercise |
|---|---|---|
| Better alignment | Neutral‑spine awareness + lengthening drills | Modified Roll‑Up on ball |
| Core balance | Simultaneous activation of deep abs & back extensors | Bird‑Dog, Dead‑Bug |
| Pain reduction | Gentle mobility + controlled stretching | Supine spinal roll, Mermaid stretch |
| Flexibility | Targeted side‑bending with props | Side‑lying hip‑opener with strap |
| Body‑mind awareness | Breath‑linked movement cues | Diaphragmatic breathing + pelvic tilt |
Possible Risks
Over‑flexion or excessive rotation
Why it matters
Rolling “down” far enough to crush the natural curve can actually stress the vertebrae on the convex side. The NHS video warning reminds us to stop if we feel sharp pain or any new neurological symptoms.
Improper technique without qualified guidance
Getting the right help
Even a well‑designed exercise can become harmful if you’re not moving from a neutral spine. Look for instructors who list “Pilates for scoliosis” or “Schroth‑certified” in their bios, and don’t be shy about asking about modifications before the class starts.
Pre‑existing conditions
When to pause
If you’re pregnant, recovering from heart surgery, or have a recent fracture, check with your GP first. The NHS advice page explicitly says to get a professional opinion if you have any health concerns before you start.
Signs you should stop
Red flags
Sharp shooting pain, numbness in the legs, sudden loss of balance, or shortness of breath are signs to stop immediately and seek medical help. 111 online triage is a useful resource if you’re unsure.
How to mitigate risks
Safety checklist
- Start on a mat with a small wedge for support.
- Keep the range of motion comfortable – you don’t need to “touch the floor” if it hurts.
- Focus on breath before movement; a steady inhale/exhale often signals proper alignment.
- Use props (ball, strap, cushion) to reduce load on the spine.
- Track pain levels in a simple diary – if a session leaves you feeling worse, dial back.
Getting Started
1️⃣ Get medical clearance
Even though Pilates is gentle, a quick chat with your doctor or physiotherapist can confirm that the specific exercises you plan to do won’t interfere with any ongoing treatment.
2️⃣ Find a qualified instructor
Search for studios that advertise “Pilates for scoliosis” or ask a local physiotherapy clinic for a referral. A good instructor will ask about your curve, any pain points, and will demonstrate how to use props safely.
3️⃣ Choose beginner‑friendly videos
The NHS 32‑minute Pilates video for scoliosis is a solid place to start. It’s paced slowly, offers clear cues, and includes modifications for each move.
4️⃣ Set up a safe practice space
You’ll need a sturdy mat, a small wedge or rolled towel, and optionally a 9‑inch physio ball. Keep a water bottle nearby and make sure the area is free of tripping hazards.
5️⃣ Core‑activate before each session
A quick 3‑minute warm‑up—pelvic tilts, diaphragmatic breathing, and a few bird‑dogs—primes the deep muscles, making the main routine feel more stable.
6️⃣ Modify key poses
- Roll‑Up/Down: Place a ball behind your back and lean gently onto it instead of rolling fully onto the floor (The ScolioTherapist).
- Side‑lying: Keep the hips level and use a strap to limit excessive side‑bending.
- Mermaid stretch: Use a cushion under the hip on the concave side to prevent over‑stretching.
7️⃣ Progress gradually
After 2–3 weeks of consistent practice, you can add light resistance bands or increase the hold time of each move. The key is “slowly, not suddenly.”
8️⃣ Track symptoms
Write down pain levels, any changes in posture, and how you feel after each session. Re‑evaluate with your therapist every 3 months to see if the curve is stabilizing or if adjustments are needed.
Sample 20‑Minute Beginner Routine
This routine pulls together the safest, most effective moves for a typical beginner. Grab a mat, a small cushion, and a timer, then follow the flow. Each segment includes a short tip for the scoliosis‑specific adaptation.
Warm‑up (2 min)
- Seated cat‑cow – inhale to arch, exhale to round, keeping the movement small.
- Diaphragmatic breathing – place one hand on the belly, one on the ribs, and feel both expand.
Core activation (4 min)
- Pelvic tilts (10 reps) – press the low back into the mat while exhaling.
- Dead‑bug on ball (2 sets × 8 reps each side) – keep the low back pressed, let the ball support the spine.
- Bird‑dog (2 sets × 6 reps) – maintain a neutral pelvic position, avoid rotating the hips.
Spine‑lengthening series (6 min)
- Modified Roll‑Up on ball – sit tall, hinge forward onto the ball, stop when you feel the abdominals engage (no need to touch the floor).
- Standing spinal roll – roll the spine forward and back in a “wave” motion, using the ball under the shoulders for extra support.
- Hip hinge with strap – place a strap around the mid‑foot, hinge at the hips while keeping the spine long.
Side‑balance & flexibility (4 min)
- Modified side‑plank on forearm – keep hips level; if the concave side feels tighter, place a cushion under the hip.
- Mermaid stretch with cushion – sit on one heel, side‑bend gently, using a cushion to limit the range on the convex side.
Cool‑down (4 min)
- Supine gentle twist (limit to 30° each side, stop if you feel pulling).
- Neck rolls and shoulder rolls – release any residual tension.
- Final diaphragmatic breath – inhale to lengthen the spine, exhale to settle.
Do this routine two to three times a week. Notice how your back feels the next day; even small improvements in how you sit or stand are wins.
Conclusion
Pilates isn’t a magic wand that erases a spinal curve, but it is a proven, low‑impact ally that can improve alignment, strengthen the core, reduce pain, and give you a stronger sense of body awareness. By pairing the method with professional guidance, safe modifications, and a consistent practice schedule, most people find that their everyday movements become smoother and less uncomfortable.
If you’re ready to give it a try, download the free 20‑minute starter routine (link below) and book a short consult with a certified instructor who understands scoliosis. Have questions, or want to share how Pilates has changed your back? Drop a comment—let’s keep the conversation going. Your spine will thank you, one mindful breath at a time.


Leave a Reply
You must be logged in to post a comment.