Ever wonder how a tiny vial of your own blood can turn into a powerful healing boost? In just a few minutes, a clinician can draw blood, spin it in a centrifuge, and end up with platelet‑rich plasma (PRP) that’s ready to be injected straight into a sore joint, a stubborn wound, or a tired scalp. That’s the core of platelet rich plasma preparation – a process that looks technical but is actually a straightforward series of steps. In this friendly guide I’ll walk you through every stage, explain why each step matters, and share a few insider tips that come from real‑world experience. Grab a cup of coffee, get comfortable, and let’s demystify PRP together.
Why It Matters
PRP isn’t just “blood with a fancy name.” The magic lies in the concentration of platelets – tiny cell fragments packed with growth factors that signal your body to repair, regenerate, and reduce inflammation. When the preparation is spot‑on, you get better results, fewer side effects, and a more cost‑effective treatment. Miss a step, and you might end up with a bland solution that won’t do much beyond a standard blood draw.
Think of it like cooking a good pizza. The dough, sauce, and cheese are all there, but the right oven temperature, timing, and technique turn a simple flatbread into a gourmet experience. The same principle applies to PRP: the preparation process is the oven that activates the platelets’ healing power.
Core Terminology
Before we dive into the protocol, let’s get some of the jargon out of the way. Knowing these terms will make the rest of the guide feel less like a science textbook and more like a conversation with a knowledgeable friend.
- Platelet‑rich plasma (PRP) – Blood plasma that’s been spun to concentrate platelets.
- Platelet‑rich fibrin (PRF) – Similar to PRP but includes a fibrin matrix that slowly releases growth factors.
- PRFM – Platelet‑rich fibrin matrix, a more solid version used for specific orthopedic applications.
- Buffy coat – The thin, whitish layer between red cells and plasma that contains most of the platelets and white blood cells.
- Centrifugal g‑force – The “pull” the centrifuge applies, measured in “g.” It determines how quickly components separate.
- Anticoagulant – Usually sodium citrate, added to prevent clotting before the spin.
Step‑by‑Step Process
Step 1 – Blood Collection
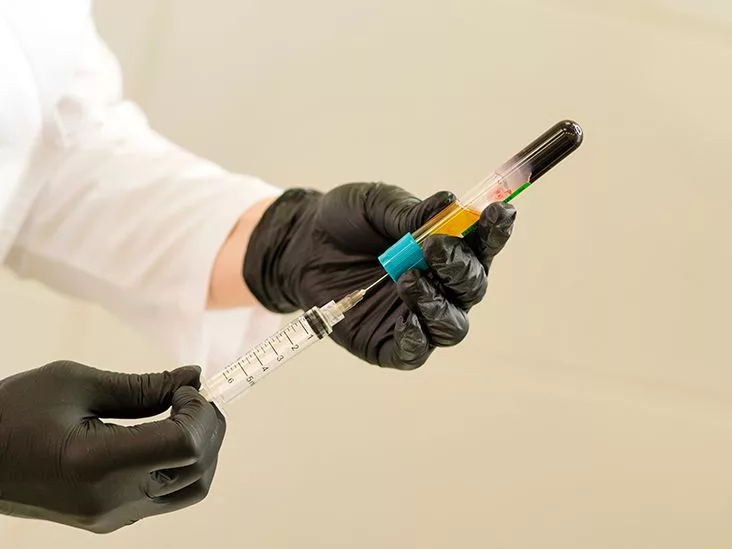
Everything starts with a modest draw of 10‑20 mL of peripheral blood. Use sterile vacutainer tubes pre‑loaded with an anticoagulant so the blood stays fluid. A quick tip from a dermatologist who has performed over 200 PRP sessions: ask the patient to drink a glass of water 30 minutes before the draw. Proper hydration can raise the platelet count by roughly 10‑15 %, giving you a richer product without any extra cost.
Step 2 – First (Soft) Centrifugation
Now we spin. The first spin is gentle – think “soft wash.” According to the Indian Association of Dermatologists taskforce, the ideal range is 100–300 g for 5–10 minutes. This separates the blood into three layers:
- Red blood cells at the bottom.
- Buffy coat (platelet‑rich) in the middle.
- Platelet‑poor plasma (PPP) on top.
Imagine a parfait: the heavy strawberries settle at the bottom, the creamy yogurt forms a middle layer, and the light fruit topping stays on top. The key is to keep the “yogurt” (buffy coat) intact.
Step 3 – Plasma Extraction
Carefully aspirate the top plasma and the entire buffy coat into a new sterile tube. Avoid disturbing the red cells – they’re like the unwanted crumbs at the bottom of a glass. Use a gentle suction with an 18‑gauge needle; a smooth pull feels like drawing honey, not like you’re battling a stubborn blockage.
Step 4 – Second (Hard) Centrifugation
The second spin is where the magic truly concentrates. The recommended force jumps to 400–700 g for 10–17 minutes (again, the IADVL guideline). This “hard wash” pushes the platelets to the bottom, forming a compact pellet, while the remaining supernatant stays as PPP.
In a study published in Cureus, this double‑spin technique produced a platelet concentration 2.5‑3× the baseline, which is the sweet spot for most therapeutic uses (as shown in a double‑spin study).
Step 5 – Final PRP Harvest
Pause for a second and admire the clear separation. Gently discard the PPP, leaving behind about 1‑2 mL of bright, amber‑tinted PRP at the tube’s base. This is the product you’ll inject.
Do you need to “activate” it with calcium chloride or thrombin? Most soft‑tissue injections (skin rejuvenation, hair restoration, joint pain) do not require activation – the body’s own collagen cascade will do the job once the PRP contacts the tissue. The IADVL consensus says activation is optional and often unnecessary.
Quality & Safety
Platelet Count Verification
Ideally, your PRP should contain 1–1.5 million platelets per microliter. Some clinics use a hemocytometer or an automated analyzer to confirm this. If you’re DIY‑curious, a simple manual count under a microscope can give a ballpark figure, but professional verification is the gold standard.
Sterility Checks
Even though the blood is your own, maintaining a sterile environment prevents infection. A closed‑system kit eliminates exposure to the air, but if you’re using the manual double‑spin method, make sure all syringes, tubes, and the centrifuge chamber are disinfected with 70 % isopropyl alcohol before each use.
| Common Error | Impact on Outcome |
|---|---|
| Under‑spinning (too low g‑force) | Platelets stay mixed with red cells → lower concentration → weak therapeutic effect. |
| Over‑spinning (too high g‑force) | Platelet damage → reduced growth factor release. |
| Mixing anticoagulant poorly | Clot formation → loss of usable plasma. |
| Delaying injection >4 h | Platelet activation in the tube → decreased potency. |
Timing Matters
PRP is best used within four hours of preparation. If you have to store it, keep it at 4 °C and aim to inject within 24 hours – but expect about a 30 % drop in efficacy after that point, according to a formulation study from Marseille (Bausset et al.).
Clinical Uses
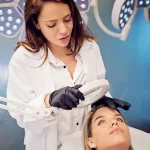
Dermatology & Aesthetics
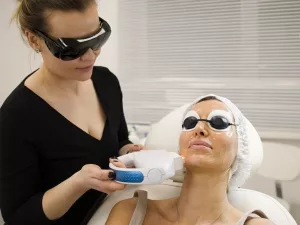
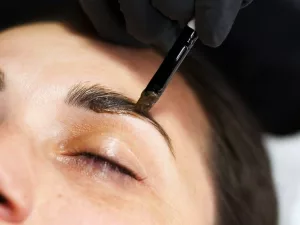
From smoothing fine lines to speeding up wound healing after laser resurfacing, PRP’s growth factors (PDGF, TGF‑β, VEGF) kick‑start collagen synthesis. Many patients report softer skin texture after just two sessions spaced a month apart.
Orthopedics & Sports Medicine
Joint‑level injections for osteoarthritis, tendinopathy, and muscle strains have become commonplace. The concentrated platelets act like a tiny repair crew, delivering cytokines directly where the tissue is damaged. In a 2021 systematic review, patients receiving PRP reported an average 30 % reduction in pain scores within six weeks.
Hair Restoration (Trichology)
When injected into the scalp, PRP can stimulate dormant follicles. A small case‑series showed a 20‑30 % increase in hair thickness after three monthly treatments, highlighting the versatile benefits of platelet‑rich plasma therapy.
Risks & Contra‑indications
While PRP is generally safe because it’s autologous, there are a few caveats to keep in mind:
- Infection – Rare, but possible if aseptic technique lapses.
- Excessive swelling – Usually mild, resolves in 48 hours.
- Platelet dysfunction – Patients on high‑dose aspirin or anticoagulants should pause medication 5‑7 days before the draw.
- Blood disorders – Those with thrombocytopenia, active malignancy, or severe anemia are not ideal candidates.
Balancing the benefits with these risks is essential. The same IADVL recommendations emphasize a thorough patient questionnaire to flag potential red flags before proceeding.
Kits vs Manual
Cost Comparison
| Option | Approximate Cost per Session | Platelet Yield | Ease of Use |
|---|---|---|---|
| Commercial PRP Kit | $250‑$500 | 1.2‑1.8 × baseline | Plug‑and‑play, minimal training |
| Manual Double‑Spin | $30‑$50 (reusable centrifuge) | 2.5‑3 × baseline | Requires training, but highly reproducible |
If you run a busy clinic, a kit might save time. If you love the hands‑on feel of science and want to maximize platelet concentration, the manual method is a rewarding alternative. Many practitioners start with a kit for consistency, then graduate to the double‑spin once they’re comfortable with the process.
Final Checklist
Print this out, stick it on your fridge, or keep it on your phone. Having a quick reference makes every PRP session run like a well‑rehearsed dance.
- ✅ Verify patient hydration (water 30 min prior).
- ✅ Use sterile, citrate‑filled tubes (10‑20 mL total).
- ✅ First spin: 100–300 g, 5–10 min.
- ✅ Aspirate plasma + buffy coat gently.
- ✅ Second spin: 400–700 g, 10–17 min.
- ✅ Discard PPP, retain 1‑2 mL PRP.
- ✅ Check platelet count (1–1.5 M/µL).
- ✅ Inject within 4 h (or store at 4 °C < 24 h).
- ✅ Observe patient for 30 min post‑injection.
Conclusion
There you have it – a friendly, step‑by‑step rundown of platelet rich plasma preparation that covers everything from the science behind the platelets to the nitty‑gritty of centrifuge settings, safety tips, and real‑world applications. The takeaway? PRP is only as good as the process that creates it. By following a standardized double‑spin protocol, checking platelet counts, and preserving sterility, you give yourself (or your patients) the best chance of enjoying the many platelet rich plasma benefits – faster healing, reduced pain, and a natural boost to tissue regeneration.
Now that you’re armed with the know‑how, what’s the next step for you? Are you planning to discuss PRP with your doctor, or perhaps you’re a clinician ready to upgrade your clinic’s preparation method? Whatever the path, feel free to leave a comment, share your experiences, or ask any lingering questions. We’re all in this healing journey together, and I’m excited to hear how PRP works out for you!


Leave a Reply
You must be logged in to post a comment.