Ever taken a sip from a bottle that smells like that “forgot‑the‑gym‑bag” drawer? Yeah, we’ve all been there. The good news? You don’t need a chemistry degree or a million‑dollar cleaning kit to get that fresh‑tasting sip back. In the next few minutes we’ll walk through everything you need to know to clean water bottles—whether they’re clear plastic, sleek stainless steel, sturdy glass, or the bendy silicone kind you love for trail runs. Let’s‑go!
Why Clean It?
First thing’s first: why bother? A dirty bottle can become a tiny, dark haven for bacteria, mold, and funky odors. The REI guide explains that even a teaspoon of bleach mixed with baking soda can kill millions of germs that love to hide in those microscopic scratches. Besides the health factor, a clean bottle tastes better, smells better, and—let’s be honest—looks cooler on your desk.
Regular cleaning also extends the life of your reusable bottle. Plastics can develop permanent odor pockets, stainless steel can develop a metallic aftertaste, and silicone can become a breeding ground for mold if left damp. By keeping everything sparkling, you get more sips per bottle and reduce waste—win for you and the planet.
Cleaning Frequency Guide
| Bottle Type | Daily? | Weekly Deep‑Clean? | When to Sanitize |
|---|---|---|---|
| Plastic (PE, PP, Tritan) | Rinse after each use | Yes (vinegar or baking‑soda) | After strong‑flavored drinks |
| Stainless Steel | Rinse daily | Yes (baking‑soda paste) | After coffee/tea, or if metallic taste appears |
| Glass | Rinse daily | Optional (vinegar rinse for hard water) | When clouded or smelly |
| Silicone / Soft‑Shell | Rinse daily | Yes (tablet or vinegar soak) | If you spot mold or a sour smell |
| Hydration Reservoirs | Rinse after each hike | Weekly (bleach + baking‑soda soak) | After long trips or when a funky odor lingers |
Bottom line: a quick rinse each day, a deeper clean once a week (or after any especially odorous beverage), and a full sanitizing soak when you notice something off.
Plastic Bottles
Plastics are the most common reusable bottles, but they’re also the most prone to trapping smells because, as Water Bottle Advisor points out, they act like microscopic sponges. Here’s the game plan.
Everyday Clean
- Disassemble the lid, straw, and any removable parts.
- Rinse with warm water to flush out loose residue.
- Add a few drops of fragrance‑free dish soap, fill halfway, and scrub with a soft, nylon bottle brush. Avoid abrasive sponges—they can scratch and create new bacterial hideouts.
- Rinse until no suds remain, then set upside‑down on a drying rack.
Deep Clean #1 – Vinegar Soak
Mix 1 part white vinegar with 4 parts water, pour the solution into the bottle, seal the lid, and shake. Let it sit for 4–12 hours (overnight works best). Rinse thoroughly and air‑dry. The acetic acid breaks down lingering odors and mineral deposits.
Deep Clean #2 – Baking‑Soda Paste
Combine 2 tablespoons of baking soda with a splash of water to form a paste. Scrub the interior with your bottle brush, let sit for 5 minutes, then rinse. Baking soda is a gentle abrasive that neutralizes odors without scratching.
Sanitize (When You Need a Kill‑Shot)
For stubborn bacteria, dissolve 1 teaspoon of bleach and 1 teaspoon of baking soda in a quarter‑gallon of water. Fill the bottle, let it sit overnight, then rinse until the bleach smell disappears. This method is recommended by REI for “hard‑to‑kill” stains.
Stainless Steel Bottles
Stainless steel feels premium, and it should stay that way. The metal doesn’t absorb flavors, but it can develop a metallic aftertaste if not rinsed properly.
Hand‑Wash (Everyday)
- Warm, soapy water + bottle brush.
- Pay special attention to the cap and any silicone seals.
- Rinse well and let air‑dry on a rack.
Dishwasher Safe?
Most modern stainless bottles are top‑rack safe, but keep lids separate to avoid damage. If you’re unsure, stick to hand‑washing.
Stubborn Stains – Hydrogen Peroxide Mix
Mix ½ cup 3% hydrogen peroxide with 2 tablespoons baking soda. Let the mixture sit for 30 minutes, then scrub and rinse. This combo tackles coffee or tea stains without corroding the metal.
Metallic Taste Fix
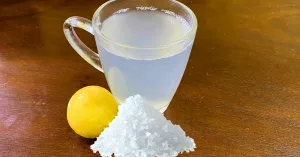
A quick rinse with a splash of lemon water (1 tbsp lemon juice per cup water) once a week neutralizes lingering metal flavors.
Glass Bottles
Glass is the cleanest material on the market—non‑porous, no odors, no bacteria hiding in scratches. That said, it still benefits from regular care.
Daily Routine
- Rinse with warm water.
- Use a mild dish soap and a soft brush (or just a sponge).
- Rinse thoroughly and set upside‑down to dry.
Hard Water Spots
If you see a cloudy film, soak in equal parts white vinegar and water for 10 minutes, then rinse. It dissolves mineral buildup.
Safety Note
Glass can break if you bang it against a hard surface. Use a silicone sleeve for extra protection during travel.
Silicone & Soft‑Shell Bottles (CamelBak, Owala, etc.)
These are the bendy, lightweight bottles you love for hiking. Their flexible walls make them a little trickier to clean, especially the bite valve.
Everyday Clean
- Disassemble all parts: lid, straw, bite valve.
- Soak in warm, soapy water for 5 minutes.
- Use a dedicated straw brush or a clean pipe cleaner to scrub the inside of the valve.
- Rinse all parts thoroughly; air‑dry on a rack.
Deep Clean – Tablet Method
Many brands sell cleaning tablets (CamelBak, for example). Drop a tablet into warm water, dissolve, then soak all parts for 15‑20 minutes. Rinse well afterwards.
Vinegar or Baking‑Soda Soak
If you prefer DIY, fill the bottle with a mixture of 1 tbsp white vinegar + warm water, or 2 tbsp baking soda + warm water, and let sit for 30 minutes before rinsing.
Dishwasher?
Only top‑rack safe soft‑shell bottles can go in the dishwasher, and you must remove the valve and straw first. Otherwise, hand‑wash.
Hydration Reservoirs & Bladders
These are the big beasts you find in backpacks. They require a bit more elbow grease.
Quick Rinse
After each hike, flush the reservoir with clean water and shake.
Sanitize (Weekly)
Mix 1 tsp bleach with 1 tsp baking soda in a quart of water, fill the reservoir, and let it sit overnight. Rinse thoroughly—no bleach taste allowed.
Drying
Hang the reservoir upside‑down in a well‑ventilated spot. A little airflow prevents mold from setting in.
Everyday Routine (Universal)
Whether you own a plastic bottle or a stainless flask, these steps keep it fresh every day.
- Disassemble. Remove the lid, any straw, bite valve, and silicone seals.
- Rinse. Warm water flushes out leftover juice.
- Soap & Water. Add a few drops of fragrance‑free dish soap, fill halfway, and scrub with a soft bottle brush.
- Cap Care. Scrub the lid with a small toothbrush or sponge.
- Rinse Again. Make sure no suds remain—any residue can taste weird.
- Air‑Dry. Place the bottle upside‑down on a drying rack. Caps should stay off to let the interior dry completely.
That’s it—five minutes, a few simple tools, and you’ve got a bottle that’s ready for your next adventure.
Deep Cleaning & Sanitizing (When It Gets Tough)
Sometimes a quick rinse isn’t enough. Here are the go‑to methods for those “oh‑no‑it‑smells‑like‑the‑gym‑locker” moments.
Persistent Odor
Vinegar soak overnight (1:4 ratio) works wonders. After the soak, give it a vigorous shake, rinse, and let dry.
Visible Mold
Combine 1 tsp bleach + 1 tsp baking soda in a quart of water, fill the bottle, and let sit 12 hours. Rinse multiple times until the bleach smell is gone.
Stubborn Stains (Coffee, Tea)
Mix ½ cup hydrogen peroxide with 2 tbsp baking soda, let sit 30 minutes, then scrub with a brush. The peroxide breaks down the pigments without harming the bottle material.
Heavy Outdoor Use
Use brand‑specific cleaning tablets (CamelBak or Owala) for a hands‑free deep clean. Drop a tablet into warm water, soak all parts for 15 minutes, then rinse.
Common Mistakes & How to Avoid Them
- Skipping the Lid. The cap and valve often harbor the most bacteria—always clean them.
- Using Bleach on Steel. It can cause corrosion. Reserve bleach for plastic or reservoir cleaning only.
- Dishwasher Without Disassembly. Water can get trapped in valves, leading to mold.
- Storing Wet & Sealed. Closed, damp bottles are a mold‑friendly environment.
- Using Scented Soaps. Fragrance can linger and affect the taste of your next drink.
Pro tip: After any cleaning session, leave the lid off for a few minutes before sealing. It lets any residual moisture evaporate.
Tools & Products Worth Owning
- Soft‑Nylon Bottle Brush. Wide enough for most mouth‑diameters, gentle on walls.
- Straw/Valve Brush. Tiny bristles reach the inside of bite valves.
- Cleaning Tablets. CamelBak or Hydro Flask tablets for hands‑free deep cleans.
- Drying Rack. Keeps bottles upright and caps separate for faster drying.
- 3% Hydrogen Peroxide. Food‑grade, perfect for stain removal.
All of these are easy to find online or at your local outdoor store. Investing in the right tools saves you time and keeps the cleaning process painless.
Wrap‑Up: Clean Bottle, Happy You
There you have it—a complete, friendly guide on how to clean water bottles no matter what material you’ve got. By rinsing daily, deep‑cleaning weekly, and sanitizing when you sense a smell, you protect your health, preserve flavor, and elongate the life of your favorite hydration companion.
Now that you’re armed with the know‑how, go ahead and give that bottle the spa day it deserves. Your taste buds (and maybe your gut) will thank you.
What’s your go‑to cleaning hack? Drop a comment below—maybe you’ve discovered a trick that isn’t on this list. If you have questions, feel free to ask—happy sipping!


Leave a Reply
You must be logged in to post a comment.